
The Honeywell TH4210U2002 is a T4 Pro Programmable Thermostat designed for easy installation and efficient temperature control, offering a user-friendly interface for scheduling and energy management.
1.1 Overview of the T4 Pro Programmable Thermostat
The Honeywell TH4210U2002 T4 Pro Programmable Thermostat is a user-friendly device designed for precise temperature control and energy efficiency. It features an intuitive interface with on-screen menus for easy installation and operation. The thermostat supports scheduling capabilities, allowing users to set heating and cooling programs tailored to their needs. With its universal mounting system and push-button controls, it ensures a seamless installation process. Additionally, the T4 Pro is compatible with smart features, enabling Wi-Fi connectivity and voice control through virtual assistants. Its advanced functionality and simplicity make it an ideal choice for modern home comfort systems.
1.2 Key Features of the TH4210U2002 Model
The Honeywell TH4210U2002 model offers advanced features such as programmable scheduling, on-screen installation guidance, and a universal mounting system for easy setup. It supports 2 Heat/1 Cool systems, providing flexible temperature control options. The thermostat also includes smart features like Wi-Fi connectivity, enabling remote access through the Honeywell Home app. Voice control compatibility with virtual assistants adds convenience. Its push-button interface ensures simplicity, while advanced setup options (ISU) allow for customized system configurations. Designed for energy efficiency and compatibility with various HVAC systems, this model ensures optimal performance and user convenience.
Pre-Installation Requirements
Before installation, ensure the HVAC system is compatible with the Honeywell TH4210U2002. Turn off power at the breaker box and follow safety guidelines to prevent damage or injury.
2.1 Compatibility Check for HVAC Systems
Verify the Honeywell TH4210U2002 compatibility with your HVAC system, including heat pumps, gas furnaces, and air conditioning units. Ensure the thermostat supports up to 2 heat stages and 1 cool stage. Check the wiring configuration to match the system requirements. Proper compatibility ensures accurate temperature control and prevents operational issues. Always refer to the manual for specific system pairings and configurations to guarantee optimal performance and avoid potential damage.
2.2 Safety Guidelines Before Starting Installation
Before installing the Honeywell TH4210U2002, ensure the HVAC system’s power is turned off at the breaker or switch. Verify the power is off using a voltage tester to avoid electrical shock. Wear protective gear, such as gloves, to prevent injury. Handle wires carefully to prevent damage or short circuits. Follow all local electrical codes and regulations. If unsure, consult a licensed professional. Proper safety precautions ensure a secure and successful installation process.

Unpacking andPreparing the Thermostat

Unpacking and Preparing the Thermostat
Unpack the Honeywell TH4210U2002 thermostat, ensuring all components, including the unit, mounting hardware, and manual, are included. Inspect for damage and prepare tools for installation.
3.1 Package Contents of the TH4210U2002
The Honeywell TH4210U2002 package includes the thermostat unit, mounting hardware, screws, wall anchors, and a comprehensive installation manual. Additionally, it contains two AA batteries for initial power and an optional cover plate for enhanced aesthetics. Ensure all components are present before proceeding with installation. The manual provides detailed instructions for each part, ensuring a smooth setup process. Verify the contents match the list in the manual to avoid missing items. Proper unpacking and preparation are crucial for a successful installation.
3.2 Tools and Materials Needed for Installation
To install the Honeywell TH4210U2002, you will need a screwdriver, drill, wall anchors, and mounting screws (provided in the package). Additional tools include wire strippers, a voltage tester, and a level for proper alignment. Ensure you have a ladder or step stool for safe access to the installation area. Refer to the installation manual for specific requirements and safety guidelines. Gather all materials before starting to streamline the process and avoid delays. Proper preparation ensures a smooth and successful installation.
Installation Process
The TH4210U2002 installation involves turning off power, removing the old thermostat, and mounting the new one using a level for proper alignment. Follow the step-by-step instructions in the installation manual to ensure a secure and accurate setup. This process ensures compatibility with your HVAC system and optimal performance. Always refer to the manual for specific wiring and configuration details. Proper installation guarantees efficient temperature control and system functionality.
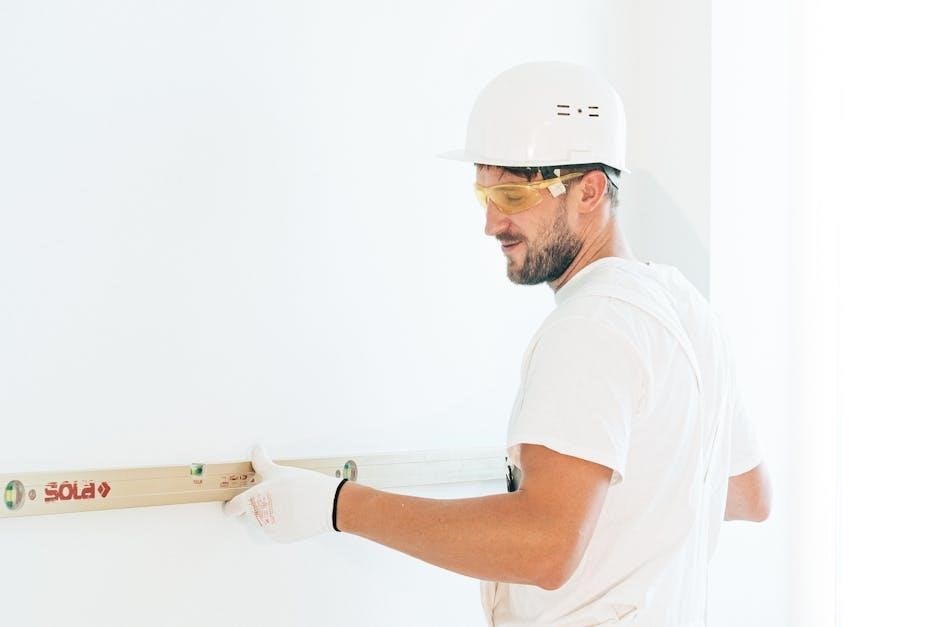
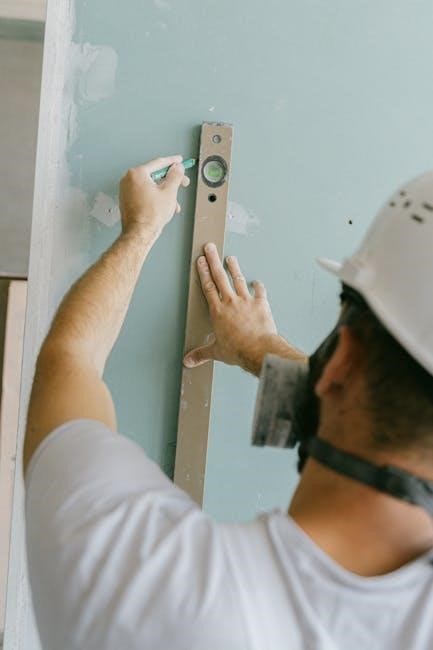
4.1 Step-by-Step Instructions for Mounting the Thermostat
Turn off the power to your HVAC system at the breaker box. Remove the old thermostat and disconnect the wires. Separate the Junction Box Adapter from the Cover Plate. Ensure the wall is level before mounting. Screw the Junction Box Adapter into the wall firmly. Align the wires according to the installation manual. Secure the thermostat to the adapter, ensuring proper alignment. Tighten all screws to hold the device in place. Double-check the thermostat’s level and wiring connections. Refer to the manual for specific wiring configurations; Power on the system to test functionality. Complete the setup by following the on-screen prompts.
4.2 Wiring Requirements and Connections
Ensure the power to the HVAC system is off before starting. Identify the wires from your old thermostat and match them to the corresponding terminals on the TH4210U2002. Common connections include R (24V power), W (heating), Y (cooling), and G (fan). For heat pumps, additional wires like O or B may be required. Consult the manual for specific wiring diagrams. Secure all connections tightly to avoid loose wires. Double-check the wiring configuration to prevent system malfunctions. If unsure, refer to the wiring requirements section in the manual or contact a professional. Turn the power back on and test the system to ensure proper operation.
4.3 Optional Cover Plate Installation
The optional cover plate is designed to enhance the thermostat’s appearance by covering marks left by a previous thermostat. Align the cover plate with the thermostat’s mounting system and gently snap it into place. Ensure the plate is securely fastened to maintain a neat and professional look. If the cover plate is not required, refer to the installation instructions for alternative mounting options. This step is purely aesthetic and does not affect the thermostat’s functionality. Follow the manufacturer’s guidelines for proper alignment and installation.

Initial Setup and Configuration
Power on the thermostat and set basic operation parameters. Access the Installer Setup (ISU) for advanced configurations. Follow on-screen instructions for a smooth setup process.
5.1 Powering On the Thermostat
After installation, ensure the HVAC system’s power is turned off at the breaker. Turn the power back on and verify the thermostat’s display lights up. If the screen remains blank, check wiring connections and ensure the power source is correct. Use the buttons to test basic functionality, such as adjusting the temperature. If issues arise, consult the troubleshooting section or reset the thermostat by removing and reconnecting the batteries (if applicable). Proper power-up ensures accurate operation and system compatibility.
5.2 Setting Up Basic Operation Parameters
Navigate through the menu to set basic parameters, such as system type (heat/cool), temperature range, and fan operation. Use the keypad to select options and confirm settings. Ensure the system type matches your HVAC configuration for proper functionality. Set your desired temperature range to balance comfort and energy efficiency. These parameters establish the foundation for the thermostat’s operation, ensuring it regulates your environment effectively. Refer to the on-screen prompts for guidance, and save settings to complete the basic configuration process.
5.3 Accessing Installer Setup (ISU) Options
To access the Installer Setup (ISU) options, press and hold the Menu and ⏤ buttons simultaneously for approximately 5 seconds. This advanced menu allows configuration of settings like temperature differential, compressor protection, and system operation parameters. Use the arrow keys to navigate through options and adjust as needed. These settings are typically used by installers to optimize system performance. Ensure changes are saved before exiting to apply updates. Refer to the manual for detailed explanations of each parameter to avoid incorrect configurations.

Programming the Thermostat
Program the Honeywell TH4210U2002 to create custom heating and cooling schedules, optimizing energy use. Use the push-button controls to set temperature preferences and timing, ensuring comfort and efficiency;
6.1 Creating a Heating and Cooling Schedule
Creating a heating and cooling schedule on the Honeywell TH4210U2002 allows you to customize temperature settings throughout the day. Use the thermostat’s push-button controls to set specific times for wake, leave, return, and sleep periods. The on-screen menu guides you through selecting temperature setpoints for each phase. This feature ensures energy efficiency by adjusting temperatures when you’re not home or when you’re sleeping. Programming is straightforward, with options to repeat settings daily or vary them for weekends. Customize your schedule to match your lifestyle for optimal comfort and energy savings.
6.2 Adjusting Temperature Setpoints
Adjusting temperature setpoints on the Honeywell TH4210U2002 allows precise control over heating and cooling levels. Use the up and down arrows to increase or decrease the desired temperature. Setpoints can be adjusted manually or within a programmed schedule. Ensure temperatures are within the recommended range to avoid system damage. For energy efficiency, set higher temperatures when away and lower when occupied. Press and hold the hold button to temporarily override scheduled settings. This feature ensures comfort while maintaining energy efficiency. Regularly review and adjust setpoints to optimize performance.
6.3 Understanding Advanced Setup Options
The Honeywell TH4210U2002 offers advanced setup options for enhanced functionality. Access the Installer Setup (ISU) menu by pressing and holding the Menu and buttons simultaneously. Adjust settings like compressor protection, temperature range limits, and fan operation. These options ensure system compatibility and efficiency. Use the ISU to configure stage heating/cooling and heat pump settings. Advanced features like adaptive recovery and cycle rate adjustment optimize performance. Refer to the manual for detailed instructions on configuring these settings to meet specific HVAC system requirements and improve overall efficiency. Proper setup ensures reliable operation and energy savings.

Smart Features and Connectivity
The Honeywell TH4210U2002 features Wi-Fi connectivity for remote control via the Honeywell Home app. It also supports voice control through virtual assistants like Amazon Alexa, enhancing convenience and control.
7.1 Connecting the Thermostat to Wi-Fi
To connect your Honeywell TH4210U2002 thermostat to Wi-Fi, navigate to the settings menu and select the Wi-Fi option. Choose your network from the list, enter the password, and confirm. The thermostat will automatically connect. Ensure your router is within range for a stable connection. Once connected, you can control the thermostat remotely using the Honeywell Home app. If issues arise, restart the thermostat or check your network strength. This feature enables smart home integration and remote temperature management for enhanced convenience.
7.2 Using the Honeywell Home App
The Honeywell Home app allows remote control and monitoring of your TH4210U2002 thermostat. Download the app from the App Store or Google Play, then log in or create an account. Once connected, you can adjust temperature settings, view current conditions, and manage schedules. The app also provides energy usage insights and notifications for system alerts. Voice control integration with virtual assistants like Alexa or Google Assistant is available for added convenience. Use the app to optimize your comfort and energy savings from anywhere, ensuring your home is always at the perfect temperature.
7.3 Voice Control with Virtual Assistants
The Honeywell TH4210U2002 thermostat supports voice control through integration with virtual assistants like Amazon Alexa and Google Assistant. This feature allows you to adjust temperatures or switch modes hands-free. To set it up, enable the Honeywell skill in your Alexa app or the Honeywell action in Google Home. Once connected, you can use voice commands to raise or lower the temperature, switch between heat and cool, or check the current settings. This seamless integration enhances convenience, letting you control your home’s comfort without needing to use the app or touch the thermostat.
Troubleshooting Common Issues
Troubleshoot common errors like wiring issues or power failures by referencing the manual’s diagnostic section. Addressing these problems ensures proper functionality and system compatibility.
8.1 Diagnosing Common Errors and Alarms
The Honeywell TH4210U2002 thermostat may display error codes or alarms indicating issues. Check the thermostat’s display for specific error messages, such as power failures or wiring problems. Refer to the manual’s troubleshooting section to interpret these codes. Common issues include incorrect wiring, lost power, or system incompatibility. If the thermostat fails to turn on, ensure the power source is active. For flashing indicators, consult the manual to identify the root cause. Addressing these issues promptly ensures optimal performance and prevents further system damage.
8.2 Resolving Wiring or Power Issues
Wiring or power issues with the TH4210U2002 thermostat can disrupt operation. First, ensure the HVAC system’s power is turned off at the breaker. Check all wire connections for secure placement and verify they match the thermostat’s terminal labels. If the display remains off, ensure the power source is correctly connected. For models requiring batteries, replace them if necessary. Consult the manual’s wiring diagram to confirm proper connections. If issues persist, contact a licensed technician to avoid further complications and ensure system safety.
8.3 Fixing Connectivity Problems
To resolve connectivity issues with the TH4210U2002, restart the thermostat and ensure it is connected to the correct Wi-Fi network. Verify the network password and check for stable internet access. If using the Honeywell Home app, ensure it is updated and properly synced with the thermostat. If issues persist, reset the thermostat to factory settings or perform a manual reboot. Consult the manual for advanced troubleshooting steps, such as checking LED indicators for connectivity status or verifying router compatibility. Contact Honeywell support if problems remain unresolved.
Maintenance and Care
Regularly clean the thermostat and check battery levels to ensure optimal performance. Update software for enhanced features and compatibility. Follow manual guidelines for long-term reliability and efficiency.
9.1 Cleaning the Thermostat
Regular cleaning ensures optimal performance and prevents dust buildup. Use a soft, dry cloth to gently wipe the thermostat’s surface and display screen. Avoid liquids or harsh chemicals, as they may damage the device; Clean the vents and sensors for accurate temperature readings. For tough stains, dampen the cloth slightly but avoid moisture exposure. Perform cleaning every 1-2 months or as needed. This simple maintenance step helps maintain precise temperature control and extends the thermostat’s lifespan. Always power off the device before cleaning for safety and effectiveness.
9.2 Replacing Batteries (if applicable)
The Honeywell TH4210U2002 thermostat may require battery replacement to maintain proper function. Use high-quality AA alkaline batteries for optimal performance. Turn off power at the circuit breaker before replacing batteries to avoid any electrical issues. Locate the battery compartment, typically on the back or bottom of the thermostat. Slide it open, remove the old batteries, and insert the new ones, ensuring correct polarity. Replace the compartment securely. If the thermostat displays a low battery warning, replace batteries promptly to prevent system lockouts or inaccurate temperature readings. Regular battery checks ensure reliable operation and maintain precise climate control. Always follow safety guidelines when handling batteries to avoid damage or hazards.
9.3 Updating Software or Firmware
Regular software updates ensure your Honeywell TH4210U2002 thermostat operates with the latest features and improvements. To update, check the current firmware version in the thermostat settings. If an update is available, connect the thermostat to Wi-Fi and use the Honeywell Home app to initiate the update process. The thermostat will restart during the update, and the process is typically automatic. Always follow on-screen instructions to avoid interruptions. Keeping your thermostat updated ensures optimal performance, security, and compatibility with smart home systems. Updates may also enhance energy efficiency and user experience.
Technical Specifications
The Honeywell TH4210U2002 operates within a temperature range of 32°F to 90°F (0°C to 32°C) and is compatible with most HVAC systems, including heat pumps and dual-fuel systems.
10.1 Operating Temperature Range
The Honeywell TH4210U2002 thermostat operates effectively within a temperature range of 32°F to 90°F (0°C to 32°C) for heating and cooling modes. It is designed to function optimally in standard residential environments, ensuring precise temperature control. The thermostat is compatible with 24V AC heating, cooling, and heat pump systems, making it versatile for various HVAC setups. Its operating range supports both conventional and dual-fuel systems, providing reliable performance across different climate conditions. Proper installation within these parameters ensures efficient and consistent temperature management. The thermostat also maintains humidity tolerance, allowing it to operate smoothly in typical indoor conditions.
10.2 Compatibility with Heating and Cooling Systems
The Honeywell TH4210U2002 thermostat is compatible with 24V AC heating, cooling, and heat pump systems. It supports single-stage and multi-stage configurations, including dual-fuel systems. The thermostat works seamlessly with gas, electric, and oil heating systems, as well as central air conditioning units. Its universal design ensures compatibility with most residential HVAC systems, making it a versatile choice for various setups. Proper installation ensures optimal performance across all supported systems, providing precise temperature control and energy efficiency. The thermostat is also compatible with zone valves and humidifier systems, enhancing its functionality in different environments.
10.3 Power Requirements
The Honeywell TH4210U2002 thermostat operates on a 24V AC power supply, typically sourced from the HVAC system. It does not require a common wire (C-wire) for operation, making it compatible with older systems. The thermostat is designed to work with 2 AA alkaline batteries for backup power during outages. Proper power setup ensures reliable performance and accurate temperature control. Always turn off power to the HVAC system before installation to avoid damage or electrical hazards. Adhering to these power requirements guarantees safe and efficient operation of the thermostat.

Warranty and Support Information
The Honeywell TH4210U2002 thermostat is backed by a limited warranty covering defects in materials and workmanship. Registration is required for warranty activation, and claims must be filed through authorized channels. Customer support is available for troubleshooting, with contact details provided in the manual. Authorized service centers can assist with repairs under warranty, ensuring prompt resolution for any issues that may arise;
11.1 Warranty Coverage and Conditions
The Honeywell TH4210U2002 thermostat is covered by a limited warranty for defects in materials and workmanship. Registration is required, typically via Honeywell’s website, to activate the warranty. The warranty period is generally one year from the date of installation or two years from the purchase date, whichever comes first. Coverage applies to defects occurring under normal use and proper installation, as outlined in the manual. Exclusions include damages caused by misuse, unauthorized repairs, or failure to follow installation guidelines.
11.2 Contacting Honeywell Customer Support
For assistance with the TH4210U2002 thermostat, Honeywell Customer Support is available to address installation, troubleshooting, and warranty inquiries. You can contact them via phone at 1-800-468-1502 or through their official website’s contact form. Additionally, live chat and email support options are accessible for convenience. The support team is trained to resolve issues related to thermostat operation, repairs, and warranty claims, ensuring prompt and effective solutions for users. Visit Honeywell’s official website for detailed contact information and support resources.
11.3 Finding Authorized Service Centers
To locate authorized service centers for the TH4210U2002 thermostat, visit Honeywell’s official website and use their Service Center Locator tool. Enter your location to find nearby certified service providers. These centers offer professional assistance for repairs, maintenance, and troubleshooting. For additional help, contact Honeywell Customer Support directly via phone or live chat to receive recommendations for authorized service centers in your area. This ensures genuine parts and expert service for your thermostat, maintaining its performance and warranty validity. Always verify authorization to avoid unauthorized repairs.
Proper installation ensures optimal performance and energy efficiency. Follow the manual for correct setup and maintenance to achieve a comfortable and cost-effective indoor environment year-round.
12.1 Final Tips for Optimal Performance
For optimal performance, regularly clean the thermostat, check battery levels, and ensure proper wiring connections. Set realistic temperature ranges and adjust schedules to match your lifestyle. Utilize smart features like remote access and voice control for convenience. Keep the thermostat updated with the latest software for enhanced functionality. Refer to the manual for troubleshooting common issues and ensure compatibility with your HVAC system. By following these tips, you can maximize energy efficiency, comfort, and system longevity. Proper maintenance ensures your Honeywell TH4210U2002 operates seamlessly year-round.
12.2 Importance of Proper Installation
Proper installation is critical for the Honeywell TH4210U2002 thermostat to function accurately and ensure system compatibility. Incorrect wiring or setup can lead to performance issues or damage. Always follow the manual’s step-by-step guide, including turning off power to the HVAC system before starting. This ensures safe installation, precise temperature control, and optimal energy efficiency. Proper installation also prevents potential errors, such as incorrect wiring connections or power supply issues, and guarantees the thermostat operates as intended, providing reliable service and extending its lifespan. Adhering to the manual’s instructions is essential for a seamless experience.

Additional Resources
- Download the Honeywell TH4210U2002 manual for installation help.
- Access online support and FAQs on Honeywell’s website.
- Watch installation tutorials for setup guidance.
13.1 Downloading the Full Manual
To access the complete Honeywell TH4210U2002 manual, visit the official Honeywell website or trusted platforms like allusermanuals.com. The manual is available in English, French, and Spanish, ensuring comprehensive guidance for all users. It includes detailed installation steps, troubleshooting tips, and maintenance advice to ensure optimal performance. Download the PDF to explore advanced features, warranty details, and technical specifications. This resource is essential for both new and experienced users, providing everything needed to operate the thermostat efficiently and effectively year-round.
13.2 Accessing Online Support and FAQs
For additional assistance, visit Honeywell’s official website or platforms like allusermanuals.com to explore online support and FAQs. These resources offer troubleshooting tips, installation guides, and answers to common questions about the TH4210U2002. You can also find diagnostic tools and step-by-step solutions for issues like connectivity problems or scheduling errors. The online support section is regularly updated, ensuring users have access to the latest information and solutions to maximize their thermostat’s performance and efficiency.
13.3 Watching Installation Tutorials
For a visual guide, watch installation tutorials for the Honeywell TH4210U2002 on Honeywell’s official website or platforms like YouTube. These tutorials provide step-by-step video instructions, covering everything from unpacking to advanced feature setup. They also include troubleshooting tips for common issues, ensuring a smooth installation process. Many tutorials are hosted by HVAC professionals, offering expert advice to help you navigate any challenges. By following these guides, you can confidently install and configure your thermostat for optimal performance and energy efficiency.